Friday, September 11, 2015


How To Stop Hair Loss And Strengthen Regrowth.  


Just like every Man or Woman, there comes a time when your hair starts to become thinner, and then it just starts falling off.  I always had a good full hair on my head and I have to say that I didn't really worry about it, for it always looked the same full and thick Only after getting older after 50 or so I noticed that the texture was different and my hairline was starting to recede. Now what could I expect at my age, it is normal to lose some of my hair. Right?


Now when I actually saw some bald spots on the top of my hair and on the sides, then I went into a panic, no way I can not see myself going bald. This started about a year ago and I started to use all the different types of miracle cures in a bottle, lotions, and/or pills.  Over the months, I did see an improvement, but just a little. Then I stopped because it was costing me a lot of money and I  resigned to stay the way I was, no choice. I gave up!

Well  a couple of weeks after that, I noticed a lot of hair in my sink and in the shower again, when I say a lot, I mean a lot. I knew that I had to do something for it was getting worse. There was no way I was going back to those previous treatments I tried before, they took my money, but it really did not work. So there has to be a better way.  

One thing that I did notice was that in the Southern part of Poland, that the mountain People had beautiful strong hair and I really did not see too many bald men around..Why?, I had to find out. So into the car and off to the Mountains. There I started asking almost everyone I could communicate with my poor Polish about what did they do to get their hair so strong and not lose it with age. Trust me that I got a lot of answers, all way from drinking more vodka to rubbing your hair with urine.  I talked to a lot of the older generation, yes even older than me, it was really a bagful of information. Now one thing kept coming up was nettle, a plant that in the past I tried to keep away from for it stung like a bee when you rubbed against it. 

I could not believe it, this plant "Nettle" it was all around me a weed that could help me with the hair loss. I had to try it, so to my kitchen, I went. After getting some instruction from the local Mountain People, I learned how to handle it and how to make it safe to drink.  I even grabbed some of the plants with the roots to replant in my home to make sure I got the right one. 

After preparing it as directed, I strained it into a glass and tried it. I have to say that it was not that bad, so for the next week, I had a glass of it every day at night.  I really did not take any more because to tell you the truth, I was scared of it, after all, it had stingers on it before boiling it.

In about a week or so I started noticing that my hair had stopped falling out and as the days went on there was less and less of my hairs in my brush and in the sink. I really did not think much of this because I was let down with those other products and did not want to count up all the eggs before they are laid.  I really believed that because of my age, that, I would have to accept the hair loss and get rid of all the mirrors in the house, so I could not see myself. 

In around the second month, I started to see that all my hair had stopped falling off and I could feel my hair getting really full and thick around my head next to my skin. The funny thing was I could actually see some very fine hair starting to grow where it was not there before, wow !, what was happening here. 

Ok, ok, I had to admit that it was working, but I wanted more, it had to work and since I had to drink a lot of it, it has to taste better, so again "off to my Kitchen"....

That's where this drink came from, for after experimenting with so many combinations it finally came to the right one.  I also changed it to the program that you see on the video, so in order to allow the body to rest from the drink for a while and then starting again gets more positive results. 

Well after six months you can look at the pictures below and see the results, it worked and I am really happy with this. I have reached my goal and I got my hair where I want it, so I have reduced the drink to about one to three glasses a week. I really do not need it anymore and I did this after the first 3 months. My hair continued to grow and become stronger and stronger, with no other side effects. 

I hope this drink helps you like it helped me, and you can trust me for I am not selling you anything, I am not asking for any type of pay. I just ask for a nice comment about your hair after you reach your goal with this drink and share it with your friends...


**********************************************************************************************************


About six months ago I saw my hair falling off and for the first time, I started to see a bald spot on the top of my head. Now my hair is full and strong, most of the bald spot has disappeared and I am loving it.  


Here is a side view of my hair falling off the sides, it just kept coming off.  This started later, for I started losing first on top, then it started on the sides, why? it was this way, I really have no idea. The important thing is that I have most of my hair back and I happy. 


**********************************************************************************************************


Recipe;

Nettle - About 15 leaves or 1 Tea bag.
1/2 Ltr./ 16 to 18oz. -  Water
1/3 to 1/2 - Lemon
1 Med. - Apple
2 Stacks - Celery
1 Bunch - Parsley


For more information, please see the video below.


**********************************************************************************************************


ATTENTION:

FIRST CHECK WITH A MEDICAL DOCTOR BEFORE USING NETTLE.


ATTENTION:

STOP! TAKING THIS DRINK IF YOU FEEL OR SEE ANYTHING OUT OF THE ORDINARY.


Nettle or Stinging Nettle is the main factor in restoring your hair. If you are using the fresh type, please be careful handling it and make sure that you properly boil it before you use it.


Make sure to keep the blender on high for about 3 minutes.


To get the bag, I had a dressmaker make a few up in different sizes in a 100% cotton material. Make sure the bag is large enough to get one blender vase size for to do it in parts will give you too much trouble. 

To remove the pulp just invert the bag and toss it into a bowl. The leftover pulp can be used to add to any cake mix.


Try  it and see  how this    works   with the bag method.  Remember  it's   best    to  have small particles in your system to last longer than to just a liquid running through.

Now if you want you can use a Juicer machine, it is really up to you.


**********************************************************************************************************


**********************************************************************************************************


Homemade Hair Tonic
Video


If You Like This Video, Ten You Will Love These. 
All By Cookingaround:


Poor  Mans  Viagra  Drink,  "Wow  Factor "
Video


Miracle  Energy Burst 
Video


Headache Remover 
Video


Please share with your Friends and Family

Tuesday, June 23, 2015

Asian Lemon Chicken Recipe


Asian Lemon Chicken Recipe


This recipe is one of my favorites and I make it very often. There are different versions to this one, instead of adding lemon, I add orange to it. Either way, it is simple, fast, and great tasting.  No matter how many times I make it, everyone always wants more, so make sure to make some extra. 

Let me know how yours turned out or/and did you do anything different to it. 


***************************************************************************************************************


Recipe;

1 1/2 Lbs. - Skinless chicken breast
2 Cups - All-purpose flour
1/2 Tsp. - Pepper
1 Tsp. - Salt
1 - Egg

Sauce 
1/2 Cup - Lemon juice
1/2 Cup - Brown sugar
1/3 Cup - Vinegar
2 Tsp. - Soya sauce (option)
1/2 Tsp. - Hot pepper flakes
2 Tbsp. - Corn starch
1 Tsp. - Ground ginger
Water as needed

Toppings
Chopped green onions
Toasted sesame seeds


For more information, please see the video below; 


***************************************************************************************************************


Here on the video, I have cubed the chicken breasts, but you can really cut them up any way you like. 

It will also be good, just to leave the breast in one piece and pour the sauce on top. Just be careful that you cook the chicken right through to the center because it will be very thick. Lower your heat for this method.


I let the chicken marinate for about  10 to 15 minutes before I cook it.

Now a couple of hours would be better, it depends on your time factor.


I only add salt in the flour because I do not want to over salt it, it holds better in the flour coating and it improves the taste better. It is not necessary to use too much salt, for the sauce has an intense flavour.

Remember to not overcrowd the chicken pieces because it will stick together and that would not be good.


Fry them on medium-high heat until they are golden brown on the outside and moist and tender on the outside. Please do not overcook them, for then they will be hard and chewy. 

If you are not sure, then just cut a piece and take a peek inside and check it. 

Now instead of adding lemon juice, try it with orange juice, different tastes of Asia, but the same awesome dish. 

To add soya sauce or not, well just because it is Asian does not mean that you have to use it. As for myself, I like it, but there is many who do not like my Girlfriend. So that really depends on your preferences to the Asian taste. 


Add whatever toppings that you like from my green onions to toasted sesame seeds. 


An awesome dish and one of my favorites. Hope you like it. 


***************************************************************************************************************


Asian Lemon Chicken Recipe
Video


If You Like This Video Than You Will Love These. 
By Cookingaround.


Garlic   Ginger Chicken
Video


Honey Sriracha Chicken
Video


Chicken Stir Fry
Video


Please share with your Family and friends, below; 


Tuesday, June 9, 2015

Lose 10 to 17 Lbs. Guaranteed - Magic 7 - Day Weight- loss Plan


Lose 10 to 17 Lbs. Guaranteed -  Magic  7 - Day Weight-loss Plan


So the Winter is over and you have gained a few pounds, now what? Start with this 7-Day Diet Soup and if you did everything correctly and you did not cheat, then you can expect to lose around 10 to 17 lbs. Yes, that is correct, but you must follow the Plan. 

I have heard about this soup now for a long time because it is what they use to reduce a person's' weight rapidly and safely before surgery. It is safe, but you should only stay on it for the full 7 days and no more. Then you should go back to your normal eating plan. 

So of to the Kitchen, I went to get this soup copycatted just like the one the hospitals were using. After a few tries and a lot of asking questions to some of the hospital kitchen Staff, I finally got it right. It was not easy to get it done right, but well worth it.

Now in addition to making this soup with all the others, and with the super success of my other soup  " Magic Diet Soup # 1 ". I have been asked to sell my videos and offered a lot of money to give some  Weight Loss Company the write-up link to my videos. I have refused all because I believe that you do not need all those super pills and give out your money when you can do the same in your kitchen with some basic things. So in conclusion, I ask nothing for my recipe's on weight loss, quite simply, it worked for me and it will work for you and you can trust me on that. 

All here for you to enjoy.

Please let me know how it worked for you and how much weight did you lose. 


*********************************************************************************************************


Recipe;

3 Cups - Fresh  tomatoes
3  Cups -  Pasta sauce
1⁄3 Cup -  Tomato paste (1 small jar or can)
5 -  Green onions
2 Tbsp.-  Low-sodium veggie stock
1 Bunch -  Celery &  (some) tops
2 Cups - Fresh green beans
2 - Red or green bell peppers
2 Cups -  Carrots
1 Tsp. -  Chili powder
1 Tsp. - Ground cumin
2 Tsp. - Sweet paprika
1/2 to 1 Tsp. -  Cayenne pepper
2 Tsp. -  Prepared mustard

1/2 to 2  Tsp. -  Ground black pepper


For more information, please see video below;


*********************************************************************************************************


Directions 

Soup Diet -

Day #1.
Eat as much of any fruit you want EXCEPT BANANAS and AVOCATOES.
Eat only soup and fruit today but eat all you want.
------------------------------------------.
Day #2.
All Veggies.
Fill up on fresh vegetables (salads etc).
Eat all the soup you want and have a large baked potato with butter at dinner time.
But NO FRUIT TODAY.
-------------------------------------------.
Day #3.
Eat all the soup, fruit and veggies you want, but NO POTATOES.
If you haven't cheated you will have lost.
5-7 lbs by tomorrow morning.
-------------------------------------------.
Day #4.
Bananas and skim milk.
Eat at least 3 bananas and all the milk you want today.
Remember, you can have soup anytime you want.
--------------------------------------------.
Day #5.
Beef and Tomatoes.
You can have up to 20 ounces of beef or skinless chicken breast and 6 tomatoes in any style you like.
Remember to eat soup too.
-------------------------------------------.
Day #6.
Beef and Vegetables.
Eat all the beef and veggies you want today.
You can have 2-3 steaks (minimum fat) if you want, with green leafy vegetables.
But NO POTATOES.
Don't forget to have soup.
--------------------------------------------.
Day #7.
Brown rice (yes BROWN), unsweetened fruit juice, and veggies today.
Eat all you want whenever you want and have soup as often as you can.

The soup is the key --


Remember, the more you EAT THE SOUP, the better it will work on losing the weight. 


*********************************************************************************************************


Start with fresh vegetables, homegrown or farmers local crops are the best. I know it depends on the season, but if you look for it, you will find them.  

As for your tomato sauce, homemade is the best but if you do not have any, then you can use  Fresh tomato juice (low-sodium). See my recipe here for  " Homemade Tomato Sauce ".


Cut all the veggies as small as possible, because in the way, your body will digest it better and it will have a better effect on losing your weight. 

The pot size depends on you and how much of the soup are you going to make. As for me, it was 2 1/2 pots of this size pot.  I just put the whole pot into the fridge and that keeps it well,  as I use it up.


Do not forget to add ALL the spices I show in the video because this is where that fat burning comes from. If you are sensitive to spicy foods, then you can cut down on it, but it will not work as good.

The spices increase your metabolism and that burns fat, and that is what you want from this soup.


On the boiling point of the soup, please set the time to 30 minutes, but if you are sensitive to fiber, then set it to 40 minutes or more. 

For some people,  the fiber from veggies will give them stomach problems.


Remember that this is a DIET soup to lose weight, so please DO NOT add any salt to it. There is some salt in the low-sodium stock and some the tomato sauce, which is more than enough for this size of soup and it should not give any bad effect on this soup.


Now in addition to my spices, you can add more, like herbs or even other types of spice, but only in addition to the ones I show you on the video.

It is important to NOT make any changes to this soup for it to work properly. Add more but only after you followed the recipe.


*********************************************************************************************************


Lose 10 to 17 Lbs. Guaranteed -  Magic  7 - Day Weight-loss Plan
Video


If You Liked This Video Then You Will Love These. By Cookingaround


Magic Diet Soup #1 -  Lose Weight Fast
Video


Magic Diet Soup -  The In-Between Soup  #1
Video


Green Monster Fat Burner  Soup
Video


Please share with your friends and family, below. 


Monday, June 8, 2015

Mushroom Breadsticks - Pierogi Szwedzkie


Mushroom Breadsticks - Pierogi Szwedzkie


I remember when my Girlfriend  took me to a restaurant in Krakow Poland for the first time that served a very  strange pierogi. It was on display and it looked like something I never saw before. Being, at least  2 feet long I thought, how can they make any money just selling this funny mushroom breadstick. 

As it turned out, it was really a great meal, and I have to say that the place seemed to be full all the time, everyone gobbling  the thing down.   It was quite an experience and I have to admit that I did go back a few times. 

That is why I just had to come home and copycatted the recipe. Now that was not easy, but I stuck to it and it came out awesome like the real thing. it may not be as long as theirs  but just as tasty. 

Go ahead and try it, I am sure that it will be a pleaser. Please let me know how yours turned out. 


*************************************************************************************************************


Recipe:

1 lbs. -  Button or any type mushrooms
1/2 Cup - Butter
1 - Medium - Onion
1 Tsp. - Vinegar
1/2 Tsp. - Salt
1/2 Tsp. - Pepper


Topping 
1 - Egg yolk
Splash of water.

Black cumin as needed


Dough
Ready-made or homemade

2 cups - All purpose flour
1 Pkg. - Yeast
Pinch of salt
Splash of milk
2 Tsp. - Cooking oil
Water as needed


For more information please see the video below; 


*************************************************************************************************************


It is very important to let most of the water to evaporate from the mushrooms. I would say about 90% of it. Please do not think of draining the excess water and being done with it, because that is where the flavour is and I want to keep it in the mushroom, not down the drain.

Keep the mushroom piled in the middle and that will make the drying process go faster.Keep on stirring on the sides and piling it.  


Only add the butter and vinegar when the water has evaporated. If you skip this process, then your mushrooms will be very soggy and have no taste.


To make your life easier you can buy the ready-mix dough at your Supermarket or you make it from scratch. Here I used my food processor to mix up my dough then I let it rest for about 2 hours.


Your dough should be as thin as possible because you do not want a large puffy crust but a nice smooth and round finish.


Now you do not have to use the cardboard stencil like I did here, but I find this keeps them the same size. It takes out the guessing game of trying it free hand. 


Make a line with your mushroom mix and please try not to spread it around too much because then it will make  it harder to lock in the dough with mushroom at the sealing point. 

If you find that the dough slices have shrunken a bit, then just roll it a few times to get it back to its shape.


Now just roll it over and tap it in. making sure that the mushroom is in the rolled part.


Just roll the whole thing over and there you go, a perfect  breadstick.


Here I am using cornmeal so the dough will not stick when I am baking it. Now you can use other methods or even baking papers. 


Add the egg wash to  the tops of the sticks. Now I usually do not do the sides because I find that the yolk  accumulates at the bottom of the breadstick and burns during the baking. So I just cover the sides. 


Now to top it off "The Black Cumin". This gives a nice around taste  to this dish and this type of cumin is good for you. It just finishes it off to a perfect Breadstick. 


Your friends and Family will all love this recipe.

That I promise.


*************************************************************************************************************


Mushroom Breadsticks - Pierogi Szwedzkie
Video


Now If You Liked This Video Then You Will Love These.
 By: Cookingaround 


Mushroom Sauce  for Pasta
Video


Russian Perogies - Rosyjski Pierogi
Video


Magic Diet Soup -  The In-Between Soup  # 1
Video


Please Share with your Friends and family, below; 

Thursday, May 21, 2015

McDonalds Spicy Chicken Copycat Recipe


McDonalds Spicy Chicken Copycat Recipe

I have to admit that I really like this Chicken Spicy Burger from Mcdonalds, but I can not keep going out to the restaurant and getting my fill. So after a but a few try's,  I finally came up with the recipe that is very close if not right on the money to the original. 

It is so easy to make this sauce that I found myself making more and more, after all it is right out of my own home and I do not have to go out. 

Go ahead and give it a whirl and let me know how yours turned out.


*******************************************************************************************************


Recipe;

1 1/2 lbs. - Chicken breast

Sauce
3 Tbsp. - Mayo or low-fat mayo
1 Tbsp. - Sugar
1/2 Tsp. - Garlic powder
1/2 Tsp. - Ground turmeric
1/2 Tsp. - Ground cumin
3/4 to 1  Tsp. - Chilli

Splash of milk as needed

Salt and pepper to taste.

Flour Mix
1 to 1 1/2 Cups - All purpose flour
1/2 Tsp. - Garlic powder
1/2 Tsp. - Onion powder
1/2 Tsp. - Pepper, black or white
1/2 Tsp. Salt (option)


Egg Wash
2 - Eggs
1/4 Cup - Water


For more information, please see video below;


*******************************************************************************************************


It is very difficult and a waste of chicken meat to try to get the cuts perfectly round.  So they will be a little square and not so round, but they will fit on your bun and be just as awesome. 


I like to flatten the breast a little with the flat side because it makes the meat more even and it will cook better. 

Use a plastic wrap in order for the meat juices not to fly back at you. 

 At this stage of making the flour mix, I have not said anything about adding salt. The sauce is strong enough in  taste with the heat and other spices that it is not necessary to add any salt to the flour. 

Now, myself being  Portuguese Canadian I tend to like things a bit more on the salty side. So this is really up to you, add more or not. 


When working keep everything as close to as possible. In this way,  you will be more organized and there will be less of a mess. 

Don't forget, here it's ok to double-dip. 


Cook the breast for about 3 to 4 minutes on each side, but please do not over cook it because the meat will turn hard and dry. 


Go ahead and add as much sauce as you want, after all this is your burger and you can  have " It Your Way". 

Also, if you want you can add other toppings including tomatoes to it. 


*******************************************************************************************************


McDonalds Spicy Chicken Copycat Recipe
Video


If You Liked This Video, Then You Will Love These Below.
By Cookingaround. 


Old Fashion Hamburger With A Twist
Video


Old Fashion Hamburger
Video


Veggie Hamburger
Video


Please share with your Family and friends, below. 


Pork Cutlet Recipe


Pork Cutlet  Recipe
This pork cutlet is so easy to make and with the breaded crust, it is a must for you menu. Where can you find something this good that only takes about 20 minutes to make and is  awesome. I find that this dish goes good with all kind of side's, especially potatoes and  diced beets. 

However you serve it, please make sure that you make some extra because your Family and Friends will ask for more, I know. 

Let me know how yours turned out. 


************************************************************************************************************

Recipe:

2 lbs. - Pork loin or tenderloin

2 - Eggs
1 Tbsp. - Veggie stock
1/2 Cup - Bread crumbs

Salt and pepper to taste


For more information, please see video below;


************************************************************************************************************


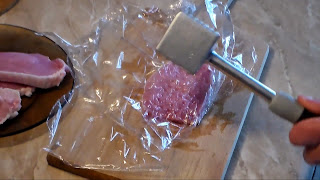
I was using pork loin, but if you prefer you can use pork tenderloin. I like to slice them about 1/2 inch thick and then pound them down  to flatten them out. In this way, the pork becomes more tender but still is moist in the middle when you cook it. 


Make sure to cover the pork loin slices in plastic foil so it will not make a mess when your are flattening them. 

Use the smallest triangle edge of the mallet for we do not want the meat with large holes in it. I use an old cutting board for this because the hammering will indent your board. 


Move everything you need close to you, so it will be easy to move things around, also it will make less of a  mess. 


Cook the cutlets on medium heat for about 3 to 4 minutes on each side. Please be careful not to overcook them because they will turn out hard and not moist. 


Always use a plate with some paper kitchen towels to soak up the extra oil. After all, there is nothing worse than having you cutlets sitting in oil in the serving plate. This just makes them soggy and bad tasting. 


************************************************************************************************************


Pork Cutlet  Recipe
Video 


If You Like This Video Then You Will Love These Below.
By: Cookingaround 


Hillbilly Stuffed Pork
Video


Pork Kaldereta - Filipino Style
Video


Góral Indoor Pork Ribs
Video


Please share with your family and Friends, below; 


Related Posts Plugin for WordPress, Blogger...